Home and selfcare
Home Medical Device Insurance in the USA

Searching for home medical device insurance in the United States may look like a confusing and frustrating process. Many insurance carriers, such as Medicare and other private carriers, establish very specific rules concerning the types of products they will pay for and under what circumstances.
When you are looking for insurance assistance in financing your home medical equipment, you want to know if insurance will help you to pay for the needed equipment for your home. Unfortunately, answering this question is sometimes not easy.
What does Home Medical Device Mean?
Regarding health insurance in the United States, the term most commonly associated with Home Medical Devices is the Durable Medical Equipment (DME).
Some examples of DME include:
- Wheelchairs and walkers
- Hospital beds
- Oxygen equipment, such as ventilators
- CPAP machines used for sleep apnea
- Diabetic testing equipment, including glucose monitors
- Infusion pump systems, along with related supplies (Medicare)
Items classified as DME do not include items intended solely for convenience (such as grab bars) and most disposable supplies outside the home.
Home Medical Device Insurance: How to Obtain
In the United States, there is no such thing as a single home medical device insurance policy. Instead, coverage for home medical devices is offered through a variety of insurance programs: public insurance (such as Medicare and Medicaid) and private health insurance plans. Each of these insurance programs has its specific requirements, costs, and procedures for obtaining coverage.
The following is a step-by-step process for obtaining insurance coverage for your home medical devices:
Step 1: Obtain a Prescription or a Doctor’s Order
Before an insurance company will consider your claim for payment for a home medical device, you will provide:
A written prescription or order from a licensed healthcare provider, and documentation that explains the reason for obtaining the equipment. All insurance providers will provide coverage for home medical devices based on the premise of “medical necessity.”
So, whether you are using public insurance (Medicare or Medicaid) or private insurance, you will provide the same documents.
Step 2. Verify that your insurance plan covers the equipment
Before obtaining the equipment you need, contact the insurance company or check the insurance plan documents to confirm:
- Is the equipment you’re seeking covered?
- Does the insurance plan require administrative steps before you can obtain the equipment? (e.g., pre-approval)
- Will the insurance company require you to purchase or rent the equipment from a preferred or approved supplier?
- What is your expected cost-sharing for this equipment (deductible, coinsurance, and/or copayment)?
Each insurance plan have their requirements for coverage and reimbursement. Coverage may only occur if you meet all conditions, even if your physician prescribes the right equipment.
Step 3: Purchase Equipment from an Approved Supplier
Most insurance companies will only pay for equipment purchased from an approved supplier. This includes equipment that is:
- Purchased from a supplier that accepts your insurance (a contracted supplier), or
- Bought from a government-sponsored program.
If you rent or purchase your equipment from a supplier that does not accept your insurance, then the insurance company may deny payment and put your financial responsibility on you.
Example: Medicare will only pay for equipment that is purchased from a Medicare-approved durable medical equipment supplier.
The type of payment and insurance payment plan varies according to the funding source for the device:
- Medicare Part B will pay 80% of the reasonable and customary fee for the device after the person has met their annual deductible of $283 for 2026. The remaining amount is the responsibility of the patient.
- Medicaid generally covers all medically necessary items without a patient co-payment requirement, but Medicaid coverage varies by state, and care providers must be aware of the differences in coverage.
- Private insurance has a wide variety of options; some companies pay the entire cost after deductibles, while others provide some payment after deductibles and coinsurance.
Some individuals opt for Medigap insurance to cover the coinsurance and deductibles in Medicare. It will reduce the out-of-pocket costs associated with acquiring durable medical equipment.
Insurance Claims Denial
It is not unusual for an insurance claim to be denied. If this happens to you:
- Request a written explanation for the denial.
- Request additional reports and documentation from your doctor.
- Submit a formal appeal according to the time limits in your insurance policy.
If your claim is for Medicare, there are several levels of appeal. Most successful appeals include additional information.
Who Should Get Home Medical Device Insurance?
In addition to determining your eligibility for coverage, it is vital you know who could get this insurance coverage.
People With Chronic Illnesses
Individuals with chronic medical conditions need specific health care that the use of home medical devices will help support their daily activities.
Examples of chronic health conditions where insurance coverage for home medical devices is beneficial include:
- Chronic obstructive pulmonary disease (COPD), including the need for supplemental oxygen
- Diabetes, including the use of blood glucose monitors or insulin pumps.
- Neuromuscular disorders, including the need for using lift equipment and wheelchairs.
Read Freestyle Libre 3 vs Dexcom G7: Which CGM is Worth Your Money
While chronic medical conditions are manageable, home medical devices may still be required due to changes in your health status or the environment.
Anyone Age 65 or older or with disability
People 65 years of age and older will qualify for the Medicare health insurance program and will therefore qualify for home medical device coverage through Medicare.
However, qualifying individuals age 64 and younger who are disabled may also qualify for Medicare or Medicaid and may have employer-sponsored insurance coverage through an employer or be able to buy health insurance coverage through an exchange.
If you or your family member is likely to need ongoing respiratory support, enhanced mobility, or other types of home essential medical equipment to help with daily functioning, understanding the coverage now will help relieve any future financial burdens.
Home Medical Device Insurance In The U.S.
1. Medicare
Medicare’s health insurance program is a Federal program that pays for durable medical equipment to be used in the home. To qualify, you must have Part B of the Medicare program; for example, your doctor must provide a prescription for the device. The supplier of the device must be a company approved under Medicare.
Once you meet these requirements, Medicare usually pays 80% of the approved costs for the device after the deductible has been met, and you would pay 20% of the approved cost as coinsurance if the supplier agrees to accept assignment.
Many Medicare Advantage Plans (Part C) also cover durable medical equipment, but you should follow the rules of each specific plan, e.g., limited supplier networks.
2. Medicaid
Every state has different coverage for durable medical equipment under Medicaid, but the coverage is typically for medically necessary durable medical equipment.
Medicaid covers several devices not covered by Medicare or by private insurance, and is designed for people with low income or for people with disabilities, so it often fills in the gaps that exist between them. Examples of items covered with Medicaid are:
- Mobility devices (wheelchairs)
- Portable oxygen and other respiratory equipment, and
- Diabetic glucose monitoring supplies and other supplies for individuals with diabetes.
Note: The best thing to do is contact your state Medicaid office for the specifics of what your state covers.
3. DME Coverage Under Private Health Insurance
Employer-sponsored plans, ACA Marketplace Plans, and private insurance products provide coverage for durable medical equipment. This coverage typically requires:
- A prescription from a health provider for the specific device
- Prior authorization for expensive devices
- Using only in-network Durable Medical Equipment (DME) suppliers.
Cost sharing through your health insurer may vary based on the deductible and coinsurance structure of your plan.
4. Supplemental Insurance Options
- Medigap Insurance (Medicare Supplemental Insurance) helps provide coverage for some out-of-pocket expenses incurred while enrolled in the Medicare program (20% coinsurance).
- Employer-sponsored supplemental policies may add coverage for additional specialized medical equipment not completely covered under the primary health plans.
5. Other Options for Finding Equipment
If your insurance does not provide sufficient coverage or denied the claim for your medical device, other potential sources may include:
- State-operated disability programs
- Veterans Health Administration assistance available to eligible veterans
- Charitable organizations that provide grant funding for DME
- Local public agencies (Area Agencies on Aging) or DME loan programs operated through local health departments.
Costs of Out-of-Pocket
Most plans, even those with full coverage, still have the following:
- Deductibles
- Coinsurance
- Charges not covered by the insurer
- Possible Up Front Payments.
Insurance Coverage of Home Medical Device
Once an individual learns about the insurance process and who qualifies, the next question is, “What does the coverage include?” In the case of home medical devices in the USA, the focus of the coverage is on home medical devices that support medical care.
Home medical devices covered by most insurance providers are categorized as Durable Medical Equipment Insurance (DME), meaning that they must meet medical necessity, recommended by a healthcare provider. Most insurance providers include different types under the blanket coverage of DME.
Mobility aids are a very common category of medical equipment that often receives approval. People who need help getting around their home get this coverage. It includes the following assistive technology tools:
- Walkers and rollators
- Manual wheelchairs
- Power wheelchairs for severely limited mobility
- Mobility scooters for those who cannot safely walk
Basically, mobility devices are approved for movement at home, not for outdoor recreational or leisure use.
The second major category of home medical devices includes respiratory support equipment and breathing devices. Home medical device insurance offer coverage on all of the following; however, some may only cover specific devices, while others will provide coverage for every device listed below:
- Oxygen concentrators and oxygen tanks
- CPAP and BiPAP devices for people with sleep apnea and other similar conditions
- Nebulizers for delivering medicine
- Ventilators for long-term respiratory/build-up of airflow issues
In addition to the above-listed items, if the insurance covers a home medical device, it will also frequently extend coverage for a limited supply of replacement items, such as tubing, masks, filters, etc.
What Home Medical Device Insurance Doesn’t Cover

A range of items that provide safety and health, are not considered durable medical equipment under Durable Medical Equipment Insurance.
Most insurance policies will not cover products for comfort or convenience purposes; but, they will still help someone’s daily life. Some of these items include:
- Handrails and grab bars
- Stairlifts
- Home ramps not connected to a covered wheelchair
- Nonprescription blood pressure monitors
- Fitness or wellness tracking systems.
Insurance carries a restriction on coverage for disposable or general household items that do not connect directly to that device. This distinction helps to separate what is deemed medically necessary from all others for the purposes of providing a healthier home.
Why are documents necessary to maintain the coverage?
Most insurance policies will provide you coverage for Durable Medical Equipment (DME) only for the length of your policy; after that, the same DME could lose its coverage if there is no continued documentation showing that it remains medically-necessary.
To maintain the ongoing need for long-term use of DME, many insurers require the following documentation on an annual basis:
- A revised prescription
- The latest clinical evaluations that support the need for your DME
- Documentation on how often and/or how long you are utilizing the DME as recommended by your healthcare provider.
This requirement is mostly expected for high-value or expensive DME items, without the required DME supporting documentation; coverage for the DME will be interrupted or end even if the patient still uses the DME on an ongoing or daily basis.
Planning for Future Device Needs
Insurance coverage for medical equipment should be an integral part of pre-op planning for surgery, so you know the types of medical equipment you will need to be covered by your insurance and how much out-of-pocket expenses you will incur.
With planning, you can:
- Learn about possible medical equipment coverage under your home medical equipment benefits in Medicare.
- Gather required documentation early to expedite approval of your home medical equipment.
- Prepare finances to manage expected out-of-pocket expenses.
Conclusion
By understanding how medical insurance coverage works, the types of home medical device covered by your insurance, and how documentation controls the approval process. While it is true that the home medical device insurance industry is not set up to be user-friendly, you will find it more manageable when you know what to expect. Follow these steps:
- Obtain the appropriate medical documentation from your doctor.
- Verify your coverage and policy requirements with your insurance company.
- Select an approved supplier of medical devices.
- Submit your claim correctly and appeal any denials if necessary.

With some simple home medical tools, you can monitor your health. The truth is that you don’t wait for something to go wrong before you check your health, and the interesting part is that you can do it yourself. DIY health monitoring is necessary; however, you must understand the process and know the medical device to use.
DIY health tracking is open to everyone, especially now that health costs are soaring, but it shouldn’t substitute for doctor visits. Let’s talk about what really works so that you don’t spend money on worthless gadgets.
Why DIY Health Monitoring is Necessary
Despite the huge amount most countries propose for their health sector, health care is still costly. According to one of the articles in National Institutes of Health, global life expectancy rose from 46.5 in 1950 to over 73 in 2025. This resulted in seniors needing more long-term health care.
And in certain cases, there are no symptoms until it gets to the last stages. To curb this menace, we now have home kit tools. DIY health monitoring gives instant feedback.
Heart rate, sugar level, and many more can be monitored with a DIY tool. It shows you vital information about your health. It sounds good, right? But if you don’t get it right, it can worsen the situation.
Use of DIY Health Monitoring Devices
Some devices support your health if you use them correctly. They present your health trends, but they cannot diagnose a disease. Fitness trackers, for instance, motivate you to exercise, and display activity records. Blood pressure monitors detect early hypertension warning signs, while Glucose monitors guide people with diabetes. These devices address potential issues so that the user can act fast.
For Tracking Heart Rate
Heart issues are one of the causes of sudden deaths. Although there are signs of heart failure which includes: frequent shortness of breath, constant weakness, and swelling in the legs or stomach. In this situation, anyone diagnosed of heart failure needs portable ECG monitors or smartwatches.
Sleep Tracking
If you notice regular waking or unpredictable patterns, adjust your schedule, go to bed early, and do not take caffeine one hour before you sleep. There are more important things about sleeping well than the number that appears.
When DIY Health Monitoring Saves Money
When you detect an illness early, the chances of curing it are high. Most health issues, like cancer and diabetes, are always detected late, which is why the chances of survival are almost impossible. Early detection can also reduce treatment cost.
Tracking activity also promotes steady movement, which help in reducing the risk of diabetes and cardiovascular disease. You can start by identifying a health challenge you want to monitor. If it is a sleep disorder, use it to improve your sleep or manage blood pressure. If you get an abnormal report, please see your doctor.
The Hidden Risk in DIY Health Monitoring
That you see what is presumed as a good reading on a wearable does not guarantee that there is no hidden health challenge. Cholesterol, inflammation, or disease in its early stages may not show up on consumer devices.
This is to tell you that you shouldn’t depend on your digital tool, as it can produce false readings, which will require the wrong treatment. You can start by identifying a health challenge you want to tackle. If it is a sleep disorder, see how to improve your sleep. Manage blood pressure. Increase activity. If you get an abnormal report, please see your doctor.
How to Approach DIY Health Monitoring
Ask yourself why you want the data. Is it to monitor your health or replace the regular medical checkup? You can use it monitor your health, but you should skip a medical checkup, especially if you have been diagnosed with a chronic illness.
To follow this approach,
- Choose doctor-approved tools. Follow instructions carefully.
- Record results
- Avoid self-diagnosis.
The numbers on the monitor may be incorrect. Always recheck and send the report to a clinician for proper evaluation.
Who can use DIY Health Monitoring Devices?
According to a report, approximately 41 percent of U.S. adults reported using wearable devices for health tracking in 2024, up from about 30 percent in 2020. That means over 108 million people are now tracking steps, heart rate, or other metrics regularly. However, only about 18.5 percent use them daily, and few share data with clinicians.
Despite growing adoption, the usage patterns differ by age, income, and perceived usefulness — suggesting that many people adopt DIY health monitoring casually rather than strategically.
Accuracy in DIY Health Monitoring
Knowing how accurate your wearable is makes all the difference. Modern analyses show that some devices have high sensitivity and specificity of about 95% when detecting conditions like atrial fibrillation, which is a major heart rhythm disorder.
But that high performance doesn’t apply to every metric. How accurate a result is depends on the type of device, sensor quality, and how you wear it.
Step Count and Activity Tracking: Useful but Imperfect
Activity trackers are some of the most common DIY health monitoring tools. Research indicates that people who use wearable devices are twice as likely to meet recommended weekly activity levels compared with non-users.
However, step count accuracy is not perfect, and it differs by device and context. Some models underestimate steps during daily use, especially during erratic movement, which highlights the importance of interpreting these figures as estimates, not precise biomedical measures.
Heart Monitoring Strengths and Weaknesses in DIY Health Monitoring
Monitoring your heart rate and rhythm is one of the most tangible benefits of DIY health monitoring. Devices now detect signs of irregular heart rhythms and arrhythmias, offering early alerts that may prompt medical follow-up. Research shows wearables can reach high levels of detection accuracy for certain conditions like atrial fibrillation.
Still, devices are not clinical ECG machines. They may miss subtle signals or produce false positives under specific conditions, and data interpretation outside the clinical context can mislead users. Use heart metrics for trend awareness, not diagnosis.
Sleep Tracking and Its Limits in DIY Health Monitoring
We need this. DIY sleep tracking is useful because of the effects of poor rest. Consumer devices estimate sleep duration and patterns that can motivate healthier routines. So, their ability to detect true sleep stages like REM or deep sleep is somehow limited compared with polysomnography, the clinical sleep lab standard.
Readings for wake time and total sleep duration sometimes are not the same with lab reports, which means you can only adjust your sleep pattern, but if you have serious sleep concerns, see a doctor or go to the hospital for a proper diagnosis.
Challenges in DIY Health Monitoring
One of the biggest liabilities in DIY health monitoring is inconsistent data. Consumer devices often perform differently in lab conditions compared with real-life use, and environmental factors, skin tone, motion, and placement affect results.
In addition, many metrics are not medically regulated. Only a subset of consumer monitors undergo rigorous evaluation. Users must know that not all data is clinically validated.
DIY Health Monitoring for Chronic Conditions
Some people use DIY tools to manage long-term diseases like diabetes, hypertension, and heart disease. For certain conditions, continuous glucose monitors and blood pressure devices provide invaluable trend data that supports better self-management.
Studies show that data gaps during abnormal glucose periods are common among diabetes patients, which undermines the potential benefits of DIY glucose monitoring if the user does not wear the device consistently.
Tracking health metrics constantly can affect mental well-being. A correct number gives you a sign of relief, while frequent alerts and different figures can make you feel anxious.
How DIY Health Monitoring Integrates With Healthcare Systems
DIY health monitoring is not the final solution. Although, it can support clinical care, especially when remote monitoring and telehealth are involved. Wearable use has been linked with higher telehealth adoption among aging adults as long as socioeconomic barriers like education and income are addressed.
Best Practices for DIY Health Monitoring in Everyday Life
If you don’t know how to use some of these medical home devices, trust me, you will regret buying them. To ensure that a selected device works, do the following:
- Buy the device you need
- Choose a medical-approved device.
- Recheck like every 2 weeks, not daily.
- Cross-check unusual results with clinical assessments.
Research-Backed Devices in DIY Health Monitoring
Here are categories that show stronger reliability in independent research:
Clinically Validated Blood Pressure Monitors
Home blood pressure monitoring has strong backing from organizations like the American Heart Association. Validated upper-arm cuff monitors perform far better than wrist models.
Look for devices listed on validated device registries, such as STRIDE BP, or those cleared by regulatory bodies like the FDA.
Best for:
- Managing Hypertension
- Monitoring medication response
- Early detection of high blood pressure
Avoid:
Cheap, unvalidated wrist monitors.
Read also: Upper Arm vs. Wrist Blood Pressure Monitors: Which Should You Buy?
ECG-Enabled Smartwatches
Some smartwatches now include single-lead ECG functionality. Studies show high sensitivity for detecting atrial fibrillation when compared with clinical ECG devices.
These watches are useful if:
- You have palpitations
- You are at a higher risk of arrhythmias
- Your doctor recommends monitoring
They are not replacements for hospital ECG machines. But they can trigger a timely medical evaluation.
Continuous Glucose Monitors for Diabetics
Continuous glucose monitor have strong clinical benefit for people with diabetes. They reduce hypoglycemia risk and improve glucose control when used appropriately. Use the tool if you have a condition that requires it.
Pulse Oximeters With Medical Clearance
Pulse oximeters became common during respiratory illness outbreaks. Medical-grade devices can reliably detect oxygen saturation trends.
However, accuracy may vary with skin tone and peripheral circulation. They work best for people with respiratory conditions and can only be use under medical advice.
Weight Scales With Body Composition Metrics
Smart scales estimate body fat percentage and muscle mass through bioelectrical impedance. They track trends, not exact numbers. Use them to monitor the direction of change, and not precise body composition.
Devices that are a waste of money in DIY Health Monitoring
Some categories sound advanced but lack strong evidence, examples are:
At-Home Food Sensitivity Kits
Unfortunately, many people depend on IgG antibody testing. Major allergy organizations state that IgG testing does not diagnose food intolerance. Elimination diets should be supervised by professionals.
Broad Hormone Panels Without Clinical Indication
Hormones change during the day and when menstruating. Random testing usually produces misleading results. To prevent this, consult a health practitioner for proper medical evaluation.
Microbiome Subscription Testing
The gut microbiome is complex and still under study. Results may lead to generic supplement suggestions rather than targeted treatment.
How to Evaluate a DIY Health Monitoring Product Before Buying
Before spending money, ask:
- Has this device been validated in peer-reviewed studies?
- Is it cleared or regulated by a recognized authority?
- Does it solve a specific health need I actually have?
- Can a clinician interpret the results if needed?
If you cannot answer yes to most of these questions, maybe, you don’t need the device, it will be a waste of money.
FAQs About DIY Health Monitoring
1. Is DIY health monitoring accurate enough to replace doctor visits?
No. It makes people more conscious about their health, but it does not replace clinical exams, laboratory tests, or professional diagnosis.
2. Can wearable devices detect serious heart problems?
Some devices can detect irregular rhythms like atrial fibrillation with good sensitivity, but confirmation requires medical testing.
3. Is it safe to use a continuous glucose monitor without diabetes?
Most medical guidelines do not recommend CGMs for people without diabetes unless supervised by a clinician.
4. Why do my wearable numbers change daily?
Several factors, like Hydration, stress, poor sleep, and device placement, can affect readings daily. You can check daily, maybe, in the morning, and before going to bed.
Wrapping Up on DIY Health Monitoring
DIY health monitoring should make you understand your body. You can use it to monitor your health; however, your health improves through healthy lifestyle choices, not accurate numbers derived from a tech gadget.
If you must use this approach, don’t depend on the data alone. For a complete diagnosis, you need a lab test. These home medical kits are there to support your health and not take the place of a doctor.
Checking your blood pressure at home is supposed to make you feel relaxed. For so many, it does not happen like this. Sometimes the numbers don’t look the same even after repeating the process. This is when they start to doubt the credibility of the device. What are the common blood pressure monitor problems? The answer and how to fix them are below.
Incorrect readings at times is not about the device but not knowing how to use it. Basically, blood pressure monitors at home are most often trustworthy.
When you get the hang of these things, especially if you’re someone who checks blood pressure often, it helps a lot. Accurate measurements keep everything in balance. So, spotting real changes becomes easier and there’s less worry involved. Knowing common mistakes and fixing them can make you more comfortable with taking blood pressure at home. This approach not only simplifies the task but also enhances its usefulness.
Now, let’s break it down: what exactly is a blood pressure monitor?
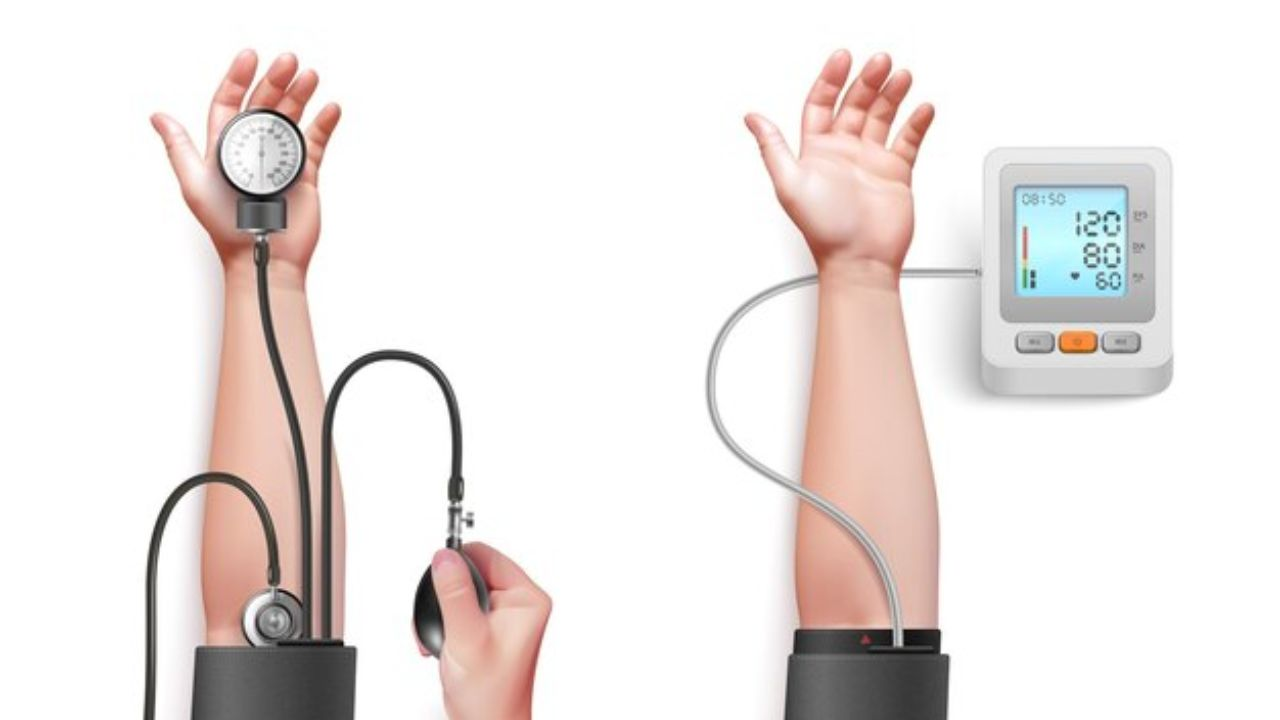
A blood pressure monitor is an instrument that measures BP. It determines the force of your blood on your artery walls as your heart beats. You receive two numbers: systolic (top number) and diastolic (bottom number). This pressure becomes different if you are moving, feeling anxious, standing up or down, or if your health conditions change.
These days, people have blood pressure monitors in their homes. Instead of going to clinics to check your vital signs, you can do it at home. However, you must be skillful in this. Using these devices in the correct way produces the actual reading.
How a Blood Pressure Monitor Works
To start, wrap the cuff around the upper arm or wrist. Next, inflate the cuff until blood flow stops. It gently compresses the artery, which reduces or nearly stops blood flow for a short period. Then, slowly deflate it and record measurements as blood begins flowing again. The device picks up signals from the artery and notes pressure changes.
You’ll see two numbers on digital monitors: systolic (when your heart beats) and diastolic (when your heart rests). Some machines are digital; others require manual operation.
Types of Blood Pressure Monitors
Blood pressure monitors come in a variety of forms, but they all operate on the same basic principle. Upper-arm monitors are often recommended because they measure pressure near the heart and usually provide the most reliable readings when used properly. Wrist monitors are more compact and portable, but they require careful positioning at heart level to avoid incorrect results.
Many users struggle with maintaining this position accurately. In clinics, manual devices rely on a stethoscope and a person’s ears for listening. On the other hand, digital home devices simplify the process for everyday use.
Why Proper Use Matters
The right way to use a BP machine is very important. If you don’t use it correctly, the device won’t work well. Stress, moving around too much, sitting poorly, and not putting the cuff on right can mess up the connection between your heart and the machine. This can lead to wrong readings. But if you always use blood pressure monitors correctly, they let you see trends in your health instead of just random numbers.
Read also:Best Blood Pressure Monitors for Seniors: Doctor-recommended
Blood Pressure Monitor Problems That Affect Accuracy
Choosing the Incorrect Cuff Size
Picking the wrong cuff size is a common problem with blood pressure monitors. You’d be surprised how often this happens, especially with shared or used devices. A tight cuff can make your blood pressure seem higher than it is, while a loose one might show a lower reading.
People with larger or smaller arms often end up using standard cuffs that don’t fit well.
Solution:
- Measure the circumference of your upper arm and use the cuff size recommended by the manufacturer.
- If your arm measurement falls between two cuff sizes, choose the larger one.
Incorrect positioning of your arm and body
Your blood pressure can vary based on your posture. If your arm hangs down, crosses in front, or sits too high, the reading may be wrong. Many people check their blood pressure while relaxing on a couch or rushing around standing up, which isn’t ideal.
Solution:
- Sit up straight with your back supported.
- Place both feet flat on the ground and relax.
- Place your feet flat on the ground.
- Rest your arm on a table so the cuff lines up with your heart.
- Let your shoulders drop and keep your hand loose, not tense.
This position ensures a consistent balance between your heart and the cuff, which helps the device accurately measure pressure.
Measuring Immediately After Activity
One mistake people make when measuring their blood pressure is doing so immediately after walking, climbing stairs, exercising, or even running around the house to do something. Blood pressure increases temporarily for all people, even healthy individuals, after physical activity. This makes people believe they have high blood pressure when, in fact, the reading is just responding to movement.
The solution is to:
- Sit for at least 5 minutes and be quiet before taking the reading.
- Don’t do any exercise, or any other physically demanding activities, before checking.
Blood pressure monitors measure systolic and diastolic blood pressure, and that is what you’re ultimately trying to track.
Talking or Moving During Measurement
When using a blood pressure monitor, it’s important not to talk or move because these actions can interfere with the device’s ability to get an accurate reading of arterial pressure. If you chat or shift your arm, the result might be incorrect. Distractions like these happen often but they can cause false readings.
Solution:
- Remain still during measurement
- Don’t talk, laugh, or fidget in your chair
- Position your arm comfortably and relax your palm so that it faces up.
The blood pressure monitor only measures blood flow to the arteries, so it needs you to be still.
Measuring Over Clothing
Never place the cuff over rolled-up sleeves when taking your reading. Doing so will prevent the cuff from fitting properly and could lead to inaccurate results. Pressure can make the cuff warp and strain. Many do this for convenience but overlook the consequences.
Solution:
- Don’t put any kind of fabric over the cuff
- Avoid tight or thick clothes on your upper arm
- For precise measurements, let the cuff touch your skin directly.
Device-Related Blood Pressure Monitor Problems
Low Battery or Power Issues
Digital blood pressure monitors require good battery power to function properly. When batteries are low, the monitor may give no readings, give incorrect readings, or give the user error messages. Most often, the user does not know that the monitor is giving inconsistent readings because of a dead or weak battery.
How to fix it:
- Change batteries regularly. Pay attention to the battery guidelines on your monitor.
- Avoid combining old and new batteries.
Devices perform better with fresh batteries, leading to fewer incorrect readings.
Poor calibration
Blood pressure monitors lack calibration. Over time, sensors inside the monitor may drift as you use it. This drift can lead to significant issues if you rely on these readings for medication or lifestyle adjustments.
How to fix it:
- Get your device checked every one to two years
- Review the results from a clinic visit.
- If an older device can’t have its calibration confirmed, it’s time to replace it.
Using Wrist Monitors Incorrectly

Wrist monitors are handy, though they’re more prone to positioning errors compared to upper-arm devices. Even a tiny misplacement can lead to big differences in the readings. So, here’s what you do:
- Make sure your wrist stays at heart level while measuring.
- Sit quietly and don’t bend your wrist.
- Also, stick closely to the manufacturer’s instructions.
If used correctly, wrist devices can provide accurate results, yet they need more focus on posture.
Timing Errors That Distort Readings
Measuring at Inconsistent Times
Blood pressure naturally changes throughout the day. Morning readings often differ from evening readings due to hormones, stress, and activity levels. Measuring at random times creates confusion and makes it harder to identify trends.
How to fix it:
- Measure at the same time each day.
- Common choices are morning and evening.
- Record readings consistently.
- Consistency supports better long-term balance in monitoring and decision-making.
Measuring Too Frequently
Checking blood pressure multiple times within minutes can cause fluctuating results due to anxiety or squeezing the arm too much. People end up chasing perfect numbers, but that’s unrealistic. For a better approach:
- Take two readings with a one-minute gap and note the average
- Avoid constant checks throughout the day unless instructed by a professional.
Lifestyle Factors That Affect Accuracy

Stress and Emotional State
Emotional stress raises blood pressure temporarily. Measuring during moments of worry, frustration, or panic can result in misleading numbers.
This is a hidden problem many people overlook.
How to fix it:
- Sit quietly and breathe deeply before measuring.
- Avoid checking blood pressure during emotional moments.
- Create a calm routine around measurement.
- Mental calm supports physical accuracy.
- Caffeine, Nicotine, and Alcohol
Stimulants and depressants can alter blood pressure for hours. Coffee, energy drinks, cigarettes, and alcohol all affect readings.
How to fix it:
- Avoid caffeine and nicotine for at least 30 minutes.
- Avoid alcohol before measurement.
- Measure before meals when possible.
- Small habit changes can greatly improve consistency.
Tips for Accurate Monitoring at Home
1. Create a Simple Measurement Routine
Accuracy improves when monitoring becomes part of a steady routine rather than a rushed task.
Choose a quiet place, sit comfortably, and follow the same steps each time. This supports long-term healthy living and reduces unnecessary worry.
2. Keep a Written or Digital Log
Relying on memory can distort patterns. Logging readings provides clarity for you and your healthcare provider.
Record:
- Date and time
- Reading values
- Any relevant notes (stress, illness, poor sleep).
- Focus on Trends, Not Isolated Readings
Blood pressure fluctuates naturally. One high reading does not mean failure or danger.
Looking at weekly or monthly trends provides a more accurate picture of cardiovascular health and helps maintain emotional balance.
3. Use Clinically Validated Devices
Not all blood pressure monitors meet medical accuracy standards. Cheap or unverified devices increase the risk of error.
Choose monitors validated by recognized medical organizations and suited to your arm size and needs. Reliable devices form the foundation of trustworthy home monitoring.
4. Review Technique Periodically
Even experienced users develop habits that reduce accuracy over time. Reviewing technique ensures continued reliability.
Revisit:
- Posture
- Cuff placement
- Timing
- Stillness.
When Blood Pressure Monitor Problems Should Not Be Ignored
If readings remain inconsistent despite correct technique, the issue may not be the monitor. It may signal an underlying health concern.
Seek professional guidance if:
- Readings vary widely without explanation.
- Symptoms like dizziness or chest discomfort appear.
- Home readings differ greatly from clinic readings.
- Accurate monitoring supports informed care, not self-diagnosis.
Final Thoughts on Blood Pressure Monitor Problems
When you use blood pressure monitors the right way, they become really useful. Most problems with these devices aren’t because they’re broken; it’s usually because people make mistakes. If you know what you’re doing wrong and fix it, you’ll trust your readings more. This can make checking your blood pressure a regular and enjoyable habit that helps you stay healthy.
Getting accurate numbers leads to better choices, improved moods, and clearer talks with your doctor. When done correctly, monitoring helps you stay aware instead of stressed out.
Do you think home A1C tests kits can provide the same results as a lab test? Many people are skeptical of using it and would want to know how accurate they are. Some use this test kit to manage diabetes, monitor prediabetes, or track long-term blood glucose levels.
Home A1C test kit manufacturers have been contending for years that their products provide results that are as good as laboratory results. Some A1C test kits are good; however, not all are accurate. They only help spot trends and are not for clinical evaluation.
This article will highlight the best A1C test kits for self-check and who needs them.
What Is an A1C Home Test?
An A1C home test estimates your typical blood glucose levels for the previous two to three months. Unlike the results of daily finger-stick glucose tests, it doesn’t reflect real-time changes. It is a measure of blood sugar control over time rather than at a single point in time.
Home A1C test kits require only a small drop of blood, which is usually collected through a finger prick. That sample is either:
- Sent to a lab for processing
- Tested right at home with a handheld device. It is expressed as a percentage.
- Higher percentages mean higher average blood sugar levels.
How an A1C Home Test Kit Works
A1C is a device that measures how much sugar has been attached to your red blood cells over the past 2 to 3 months. Glucose normally attaches to hemoglobin, the protein that red blood cells use to carry oxygen. The greater the level of your average blood sugar, the more glucose attaches to that hemoglobin. This percentage is your A1c result.
Several home A1C tests begin by taking a drop of blood from your finger. You clean your finger, use a tiny lancet to draw a few drops of blood, and adhere to the instructions in the kit meticulously. Following that, “What do you do next?” is determined by “Which version of the test do you have?”
Some at-home A1C kits require that you mail your blood sample to a CLIA-accredited lab. The sample is tested by the lab using standardized methods that are comparable to those that are used in hospitals and clinics. Results are typically available within days and delivered digitally.
Other home A1C tests, such as instant self-read devices, test the blood right away on a small handheld analyzer. These tests yield results in minutes, but they are more sensitive to proper timing, sample size, and storage conditions.
The result in both cases is an average of your blood sugar levels—not the moment-to-moment data you get with the latter method. That’s why an A1C home test is better for long-term tracking instead of immediate glucose changes.
When administered properly, a good home A1C test can provide lab-like results and a reliable window into how well your blood sugar is being managed.
Who Needs an A1C Home Test?
An A1C home test is mostly used by:
- People living with type 1 or type 2 diabetes
- Individuals with prediabetes
- Adults at risk of diabetes due to family history, weight, or lifestyle
- People monitoring treatment effectiveness between clinic visits
- Those who prefer privacy or limited clinic visits.
Also read: Best Health Tech for Managing Multiple Chronic Conditions
How Accurate Are Home A1C Tests Compared to Lab Results?
The best home A1C test kits are developed to be very similar to lab A1C testing and usually have a margin of error of ±0.5% compared to a result from a venous blood draw. Accuracy depends on:
- Method of testing (lab-analyzed vs. instant reader)
- Handling of samples
- Certification of the laboratory
- User technique (taking the test)
Tests from CLIA-certified labs tend to be more concordant with clinical results. Instant tests that are cleared by the FDA can also be trusted, but you have to be very careful with them.
Most Accurate Home A1C Test Kits (Compared to Lab Results)
Best Overall: LetsGetChecked A1C Home Test

What differentiates LetsGetChecked is its mix of accuracy, clinical oversight, and user experience. It is widely considered the most accurate at-home A1C testing kit when compared to lab results.
Features
- Finger-prick sample of blood
- The sample is tested in a CLIA-certified lab.
- Results usually take about 2–5 days.
- When compared to a standard lab, A1c testing accuracy was found to be very similar.
- FDA-approved collection technique
Because the testing is done in a professional lab, there’s less room for error. This is in contrast to how most doctors check A1C in the office.
About LetsGetChecked
- Follow-up from a nurse is optional.
- Clear digital results with explanations from a clinician
- Good for initial testing as well as ongoing monitoring
- Sample must be mailed; no instant results
This test is great for those who want the reassurance of a lab test but don’t want to go to a clinic.
Everlywell HbA1c Home Test
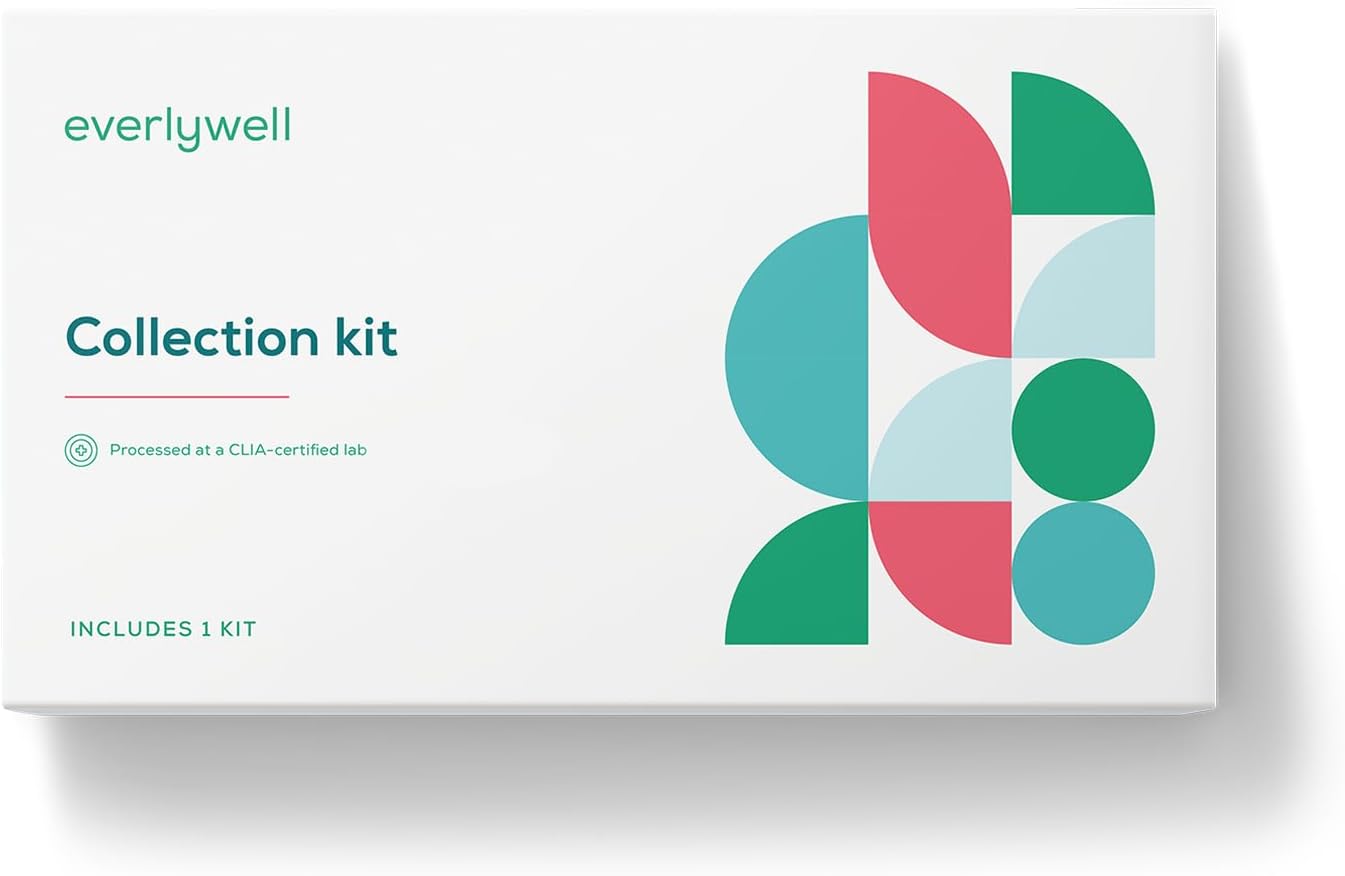
Everlywell’s HbA1c home test has a solid reputation for its low cost and good agreement with lab comparisons. It is widely picked by people who test sporadically rather than every month.
Features:
- Blood sample from a finger stick
- Labs processed through a CLIA-certified lab
- Results are typically back within a few days.
- Consistent with lab-based A1C results
- Precise numerical results along with reference ranges
Everlywell strikes a good balance between value and quality when it comes to testing accuracy.
What You Should Know about Everlywell
- No real-time results
- The collection method is easy.
- Ideal for regular monitoring
- Fewer personalized follow-ups than several high-end services
This product is designed for those users who only want accurate A1C results and do not require any other clinical features.
Best for Follow-Up Care: myLAB Box Hemoglobin A1c Screening Test
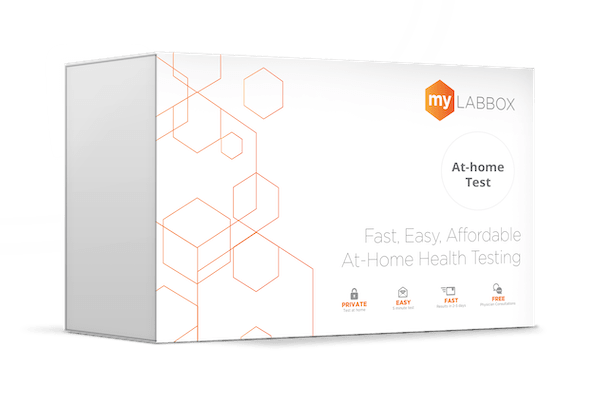
myLAB Box prioritizes testing with clinical continuity, so it can be an effective option for follow-up care after you’ve been diagnosed or your treatment has changed.
Features:
- Finger-prick blood sample
- Analysis in the lab
- Accuracy similar to the conventional laboratory test
- Results are verified by a team of healthcare professionals.
The test is NOT a replacement for routine care.
What to Know About myLAB Box
- Physician-reviewed results
- Clear interpretation for treatment tracking
- Great for trend monitoring over time
- You have to mail in your sample.
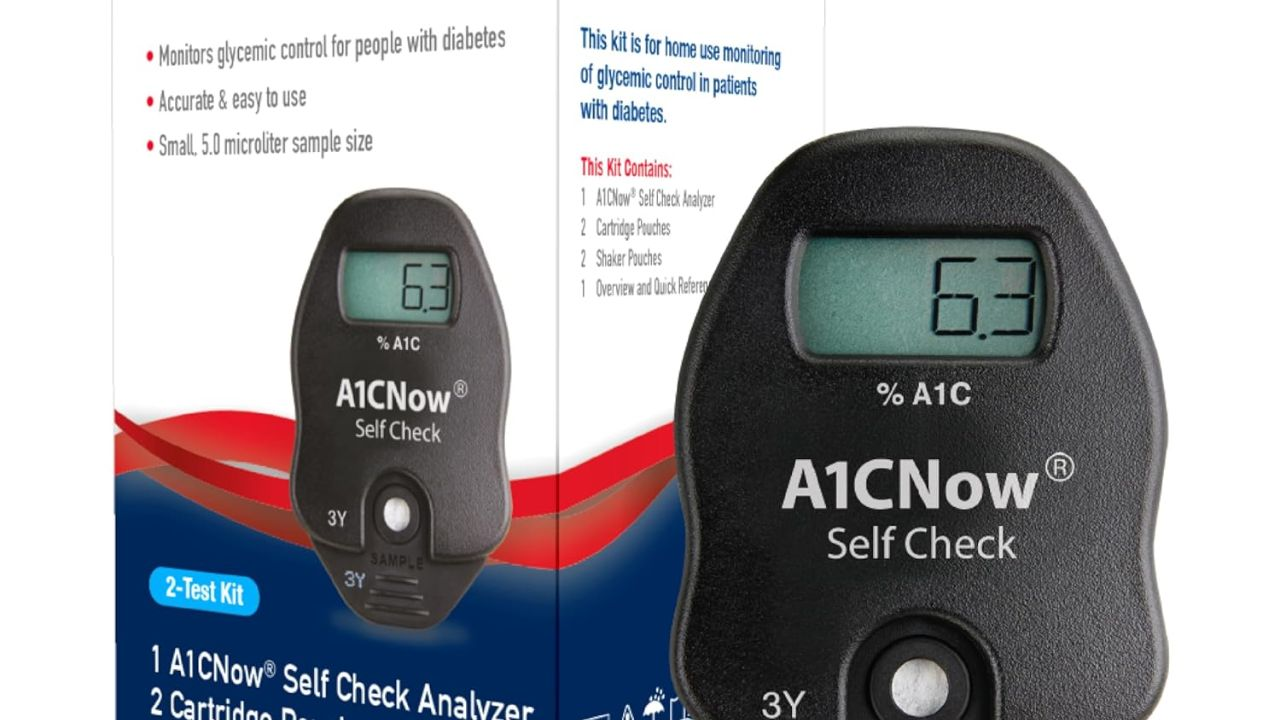
A1CNow SELFCHECK

A1CNow SELFCHECK stands apart from the other options. There is no need to send specimens to a lab, as you get the results instantly at home.
Features:
- Finger stick blood sample
- Instant digital reading
- FDA-cleared for home use
- Results in minutes
Research suggests that A1CNow SELFCHECK results can be fairly comparable to the lab results, but accuracy is highly dependent on technique and storage conditions.
About A1CNow SELFCHECK:
- No lab processing
- Good for frequent monitoring convenience
- More variability than lab tests
- Use for trend monitoring, not for diagnosis.
This test is for the experienced user who wants speedy feedback between clinical visits.
What to Know Before Choosing a Home A1C Test
- Lab-Based Vs. Rapid Tests
Lab-home A1C tests tend to be more accurate. Speed and convenience come at the expense of accuracy with instant tests.
- Certification and Oversight
Make sure the test has been processed in a CLIA-certified lab or approved by the FDA. That has a direct impact on reliability.
- Sample Handling Matters
Even the most reliable home A1C test has the potential to lead to false conclusions if:
- Sample is insufficient
- Instructions are not followed
- It’s expired or invalidated
Home Testing Has Limits
Home A1C tests are not made for making emergency decisions or for diagnosis without the involvement of a care provider. They are tools for awareness and monitoring.
Understanding Your A1C Result at Home
Usual ranges for HbA1c:
- < 5.7%: Normal
- 5.7% to 6.4%: Prediabetes
- ≥ 6.5%: Diabetes.
Are Home A1C Kits Accurate for Monitoring Long-Term R1?
Yes, if they consistently use the same methods and tests. Many people who take home A1C tests stick with one brand over time to monitor trends rather than a single reading. The usefulness of consistency
The best-performing home A1C test kits compared with the lab are those that:
- Are taken regularly
- Are followed by medical advice
- Are interpreted together with other health information
What Makes an A1C Home Test “Reliable and Accurate?
How accurate your home A1C test is depends on more than just the brand. Here’s what to keep in mind:
Make sure that the test is certified by a CLIA-approved lab. These kits have tight quality controls. Also, your blood sample has to be stable when it’s shipped. And you must understand the how to use the kit. If you don’t collect the sample correctly, that is where it can produce wrong results.
Errors in A1C Results
A1C tests aren’t totally exact, even in hospitals. Most doctors think a 0.5% difference is okay. So, if you get 6.8% at home, the lab might read anywhere from 6.3% to 7.3%.
This doesn’t mean the test is bad. It just means you should look at the overall trend, not just a single result. Consistent results are what really matter.
How Often Should Home A1C Tests Be Used?
Doctors suggest that people with diabetes use the A1C test kit every three months, and twice yearly for stable prediabetes. However, patients are to follow their doctor’s advice.
How to Prepare for a Home A1C Test
Make sure your hands are clean and warm so the blood flows well. And when you’re testing, don’t use kits that are past their expiration date. Test at room temperature. To get the right result, just do what the instructions say.
If You Test at Home, Double-Check A1C Results at a Lab
If you receive an unusual or excessively high reading, use a lab test to confirm it. This is vital because it could cause you to change your medication, food, or treatment plan.
An A1C test you do at home can give you some info about your health, but, you shouldn’t rely on it.
Why Are Some Home A1C Tests More Accurate Than Others?
Accuracy depends on how it’s done, not what they say. Home A1C tests that use labs that have been certified follow the same rules as clinics. That includes making sure everything is set up right, keeping an eye on quality, and reporting results the same way every time.
Home tests that give you instant results cut out shipping time but can change based on the user.
How big the sample is, when you do the test, and how you store it can affect the results. This explains the differences in consistency, which is, as a general rule, why home tests with lab tests are as accurate.
Using Home A1C Results in Conversations with Doctors
Home test results, like the A1C, can help when you talk to your doctor, but only if they’re from trustworthy companies. Doctors usually trust home A1C tests more if they’re done by labs with CLIA certification or devices cleared by the FDA because these follow quality standards.
Bringing your A1C results to appointments helps show patterns over time, instead of just one reading. This is helpful for checking glucose control in the long run, seeing if lifestyle changes are working, or how well you’re sticking to a treatment plan between visits.
For the most reliable result, make sure it’s consistent and well-documented. Write down the test brand and date, and whether the sample was processed in a lab. This helps your doctor understand the data. Home A1C results that are close to the clinic numbers can help with Home A1C tests are helpful, but don’t skip your regular doctor visits.
Tell your doctor which home test you’re using and how often you test so they can properly understand your results. It’s best to use home tests alongside your doctor’s tests to help make better healthcare decisions together, instead of making choices based on your home test alone.
Frequently Asked Questions
1. Can doctors trust home A1C test results?
Yes, especially when the test uses a certified laboratory or an FDA-cleared device.
2. Should home A1C results replace lab testing?
No. Home tests support monitoring but do not replace clinical lab tests.
3. How should I share my home A1C results with my doctor?
Bring a record showing the test brand, dates, and results.
4. What if my home A1C result differs from my lab result?
Small differences are normal, but confirm large gaps with a lab test.
Read also: Portable vs. Tabletop Nebulizers: Which is Better for Home Use
Final Thoughts
Home A1C testing has added to diabetes care. For accuracy, use any of the above home A1C test kits. However, the best for you will depend on what you’re looking for, such as speed, cost, follow-up care, or how clinical it is. If accuracy is what you’re after, lab-processed home A1C tests are a great option.
Note: An AIC home test kit cannot replace routine medical checkups in the hospital. It is a self-device that helps monitor your blood sugar level.
Hope this is helpful. Drop your comments below. Also like and share on your social media pages.
-
 Diagnostic & Hospital Equipments4 months ago
What Are Medical Devices? Types and Uses
-
 Uncategorized4 months ago
6 Best Heatmap Plugins – I Test, Review and Compare
-
 AI in Health care4 months ago
Remote Patient Monitoring in Modern Healthcare
-

 Review and guides3 months ago
CPAP Machines Buying Guide: The Best Models Doctors Don’t Recommend
-

 AI in Health care2 months ago
Digital X-ray vs. Film X-ray: Which is better?
-
 AI in Health care4 months ago
AI in Medical Imaging: What is Coming Next
-

 Diagnostic & Hospital Equipments1 month ago
PET Scan Machines: Understanding the Technology, and Usage
-
 Diagnostic & Hospital Equipments1 month ago
DEXA Bone Density Scanning: What You Need to Know About Bone Health